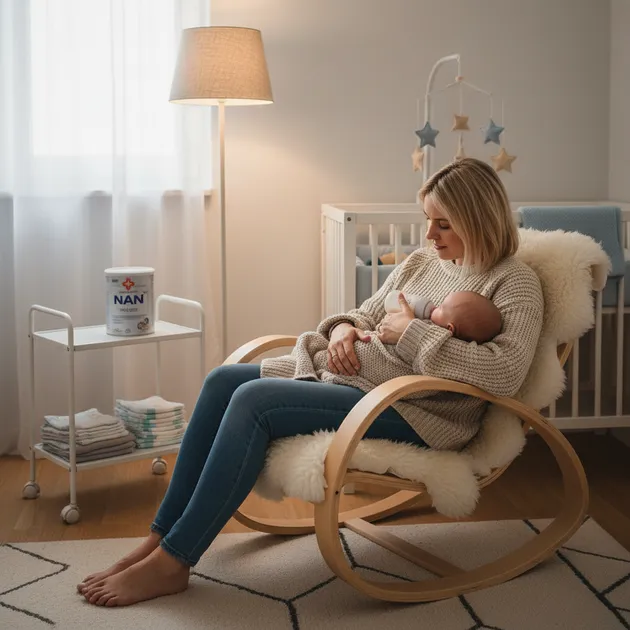
Your baby is approaching 6 months, and you're starting to think about introducing solids. Maybe you're wondering what you actually need, what you can skip, and how to best prepare. It doesn't have to be complicated — but a little planning makes daily life much easier.
Here's the practical guide to preparing for solid foods, focused on what actually works.
When is your baby ready for solid food?
According to the AAP and WHO, starting solids should happen around 6 months. Here are the signs your baby is ready:
- Can sit with support in a high chair or in your lap
- Good head control and can hold their head steady
- Shows interest in food — reaches for your food, follows the fork with their eyes
- Chewing movements, baby starts chewing on things
- Tongue-thrust reflex fading, no longer automatically pushes everything out of their mouth
Breast milk or formula covers your baby's nutritional needs for the first 6 months. Starting solids is about introducing food in addition to milk, not instead of it. Throughout the first year, milk remains the primary source of nutrition.
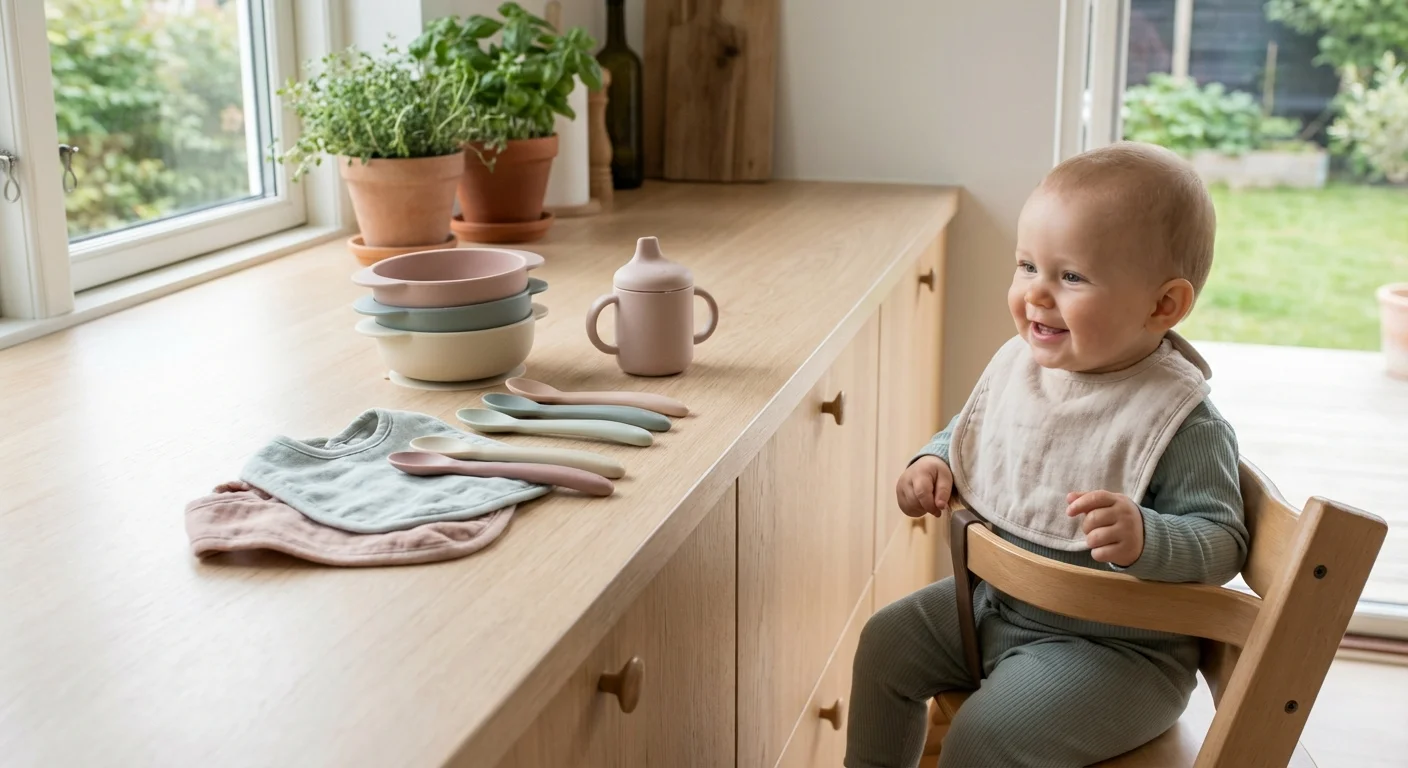
Equipment you need
High chair, the most important investment
A good high chair is the only piece of equipment you truly need. Your baby needs to sit upright with good support to eat safely.
Requirements for a good high chair:
- Baby can sit upright with support (90-degree angle)
- Footrest so feet have something to rest on
- Adjustable height to fit the table
- Easy to clean (food gets everywhere)
- Stable and safe, with harness for younger babies
Popular choices:
- Stokke Tripp Trapp: Classic Norwegian design, grows with the child, footrest included
- IKEA Antilop: Budget option, easy to clean, but lacks footrest (can be added with accessories)
- IKEA Langur: Affordable with adjustable tray
A footrest is more important than many people realize. When your baby can place their feet on something solid, they sit more stably and can focus better on eating. If the chair lacks a footrest, you can attach a temporary solution with tape and a small board.
Plates and bowls
You don't need much to start, but some things are practical:
- Suction plate: Sticks to the tray/table and is harder for baby to throw on the floor
- Divided plate: With sections for different foods, great for letting baby explore
- Small bowl: For purées and porridge
Tip: Many parents start without a plate and place food directly on the high chair tray or table. That works well, especially with finger foods.
Spoons
- Soft baby spoon: Soft tip that's gentle on gums
- Preloading spoon: A spoon you fill and let baby grip themselves
- Regular teaspoon: Also works fine for many babies
You need 2–3 spoons, one for you to feed with, and one or two for baby to explore with. Baby will learn to use a spoon themselves over time, and it will be messy. Have patience.
Drinking equipment
- Open cup: AAP recommends open cup or 360 cup rather than sippy cups with spouts
- 360 cup (Munchkin or similar): Child drinks from the rim, no spout
- Straw cup: Good option from 6–8 months
Avoid bottles with spouts for water. Open cups or 360 cups promote better oral and swallowing motor skills. There will be some spillage at first, but baby learns quickly.
Bibs and messy gear
Starting solids is messy. Prepare yourself.
- Bib with catch pocket: Catches falling food, reduces floor mess
- Long-sleeve bib: Covers arms, useful for porridge and purées
- Splash mat / floor cover: Place under the high chair for easy cleanup
- Washcloths: Have plenty available. Baby wipes also work.
Cooking equipment
You don't need specialized baby food kitchen equipment. You probably already have most of it:
- Immersion blender: For making purées (the one you already have)
- Small pot: For cooking vegetables
- Knife and cutting board: For cutting finger foods
- Ice cube trays: Perfect for freezing portioned baby food
- Storage containers: Small containers for freezing and storing
You do NOT need: a baby food maker, special steamer, baby food blender, or other expensive specialty equipment. A regular pot and immersion blender get the job done.
Equipment you do NOT need
The baby industry sells a lot of equipment that's unnecessary. Here's what you can safely skip:
- Baby food maker/steamer: A regular pot does the same job
- Baby food blender: Your regular immersion blender works perfectly
- Baby food pouches: AAP recommends limiting these. Make your own purée instead.
- Special-size baby food freezer trays: Regular ice cube trays work just as well
- Mesh feeders / fruit feeders: Baby can hold fruit pieces directly just as well
- Special baby water: Regular tap water is safe in most developed countries
Planning the first weeks
Weeks 1–2: Exploration
The first two weeks are about letting your baby get familiar with taste, texture, and consistency.
Plan:
- Start with 1 food meal per day (ideally midday)
- Offer 1–2 foods per meal
- Let baby play and explore without pressure
- Continue breastfeeding or formula as usual
Good starter foods:
- Oatmeal (provides iron and gluten early)
- Cooked and mashed carrot or sweet potato
- Mashed banana or avocado
- Cooked broccoli as finger food
Weeks 3–4: Expand the repertoire
Plan:
- Increase to 1–2 food meals per day
- Introduce new flavors, 1–2 new foods per week
- Alternate between purées and finger food
- Introduce protein sources: eggs, meat, fish, legumes
New foods to try:
- Cooked egg (mash yolk with a little water)
- Chicken or ground beef (finely shredded/mashed)
- Cod or salmon (mashed with vegetables)
- Lentils or chickpeas (cooked and mashed)
- More fruits and vegetables
Weeks 5–8: Establish a routine
Plan:
- 2–3 food meals per day
- Baby sits with the family at the table
- Introduce spices and herbs (basil, cinnamon, cumin)
- Let baby practice drinking from a cup
There is no "correct order" for introducing foods. Current guidelines say baby can taste most foods from 6 months, including allergy foods like eggs, fish, and nuts (as purée/butter). Start with iron-rich foods when possible.
Allergens, plan for early introduction
Research and current guidelines recommend introducing common allergens early, from 6 months. Here's a plan:
Allergens to introduce in the first weeks
| Allergen | Example | When |
|---|---|---|
| Gluten | Oatmeal, bread pieces | Weeks 1–2 |
| Egg | Cooked egg, omelette | Weeks 2–3 |
| Fish | Cod, salmon (cooked) | Weeks 2–3 |
| Peanuts | Peanut butter on bread | Weeks 3–4 |
| Dairy | In porridge/cooking | Weeks 3–4 |
| Sesame | Tahini/hummus | Weeks 4–5 |
Important: Introduce one new allergen at a time. Give a small amount and wait a few days to watch for a reaction. If there's no reaction, continue giving it regularly (2–3 times per week) to maintain tolerance.
If your baby has severe eczema, a known family history of allergies, or confirmed existing allergy, speak with your pediatrician or allergist about a customized allergen introduction plan.
Hygiene and food safety
Basic hygiene rules
- Wash hands, yours and baby's, before every meal
- Clean equipment thoroughly (dishwasher or boiling for the youngest babies)
- Storage: Fresh baby food in the fridge for a maximum of 24 hours
- Freezing: Frozen baby food keeps for 1–3 months
- Reheating: Heat thoroughly, cool down, and check temperature before serving
Foods to avoid in the first year
| Food | Reason |
|---|---|
| Honey | Botulism risk |
| Whole nuts | Choking hazard |
| Spinach, beets (large amounts) | Nitrate risk |
| Rice milk / rice cakes | Arsenic (avoid until age 5) |
| Added salt | Burdens kidneys |
| Added sugar | Unnecessary, damages teeth |
| Cow's milk as a drink | Not until 12 months |
How to make the first meals
Basic purée recipe
- Wash, peel, and cut vegetables/fruit into pieces
- Cook in a little water until soft (10–15 min)
- Blend with immersion blender to desired consistency
- Add a little oil (canola/rapeseed) for energy and fat-soluble vitamins
- Cool to appropriate temperature
Basic finger food recipe
- Cut vegetables into strips (roughly the size of an adult finger)
- Cook or steam until soft but not falling apart
- Cool to room temperature
- Serve on the high chair tray or plate
Portioning and freezing
Make large batches and freeze in ice cube trays. Each cube is about 1–2 tablespoons, perfect baby portions. Label with date and contents.
Weekend batch cooking: Spend an hour on the weekend making 4–5 different purées and finger food pieces. Freeze in portions. Then you have ready-made baby food for the whole week.
Shopping list for starting solids
Here's a simple shopping list for the first week of solid foods:
Equipment (buy once)
- High chair with footrest
- 2–3 soft baby spoons
- Suction plate or small bowl
- Open cup or 360 cup
- Bib with catch pocket
- Floor mat / splash mat
- Ice cube trays for freezing
Food for the first week
- Rolled oats (fine)
- Bananas
- Avocado
- Carrots
- Sweet potato
- Broccoli
- Eggs
- Canola oil
Frequently asked questions
Should we start with purée or finger food?
Both work well, and you can combine them. Some babies prefer to be in control (finger food/BLW), while others are more comfortable with purée and spoon at first. Try both and see what your baby prefers. The most important thing is that baby gets to explore food at their own pace.
Do we need to wait 3 days between each new food?
No, that's not necessary for most babies. This was a common recommendation in the past, but current guidelines have changed. You can introduce new foods daily, except for the most common allergens where it makes sense to introduce one at a time and wait a couple of days to observe for reactions.
Baby refuses to open their mouth. What do we do?
Don't force it. Some babies need time before they're ready. Try again the next day or in a few days. Let baby watch you eat, offer food without pressure, and let baby explore food with their hands. Many babies who refuse a spoon will accept finger foods they can control themselves.
Can we use store-bought baby food?
Yes, commercial baby food is safe and can be used as a supplement. But homemade food should be the foundation. Premade food often has a uniform consistency that doesn't teach baby to handle different textures. Pouches should be limited, they often contain high sugar levels and provide little chewing practice.
Does baby need vitamin D when they start eating solids?
Yes. The AAP recommends vitamin D supplementation (400 IU/day) for breastfed infants from shortly after birth until they are consuming adequate amounts of vitamin D-fortified formula or food. Food alone doesn't cover vitamin D needs, especially in regions with limited sunlight.
Read more
- Introducing solids: Complete guide
- Baby-led weaning (BLW)
- Allergens for baby: Safe introduction
- Homemade baby food
- Baby food storage and freezing
- Choking hazards for babies
- Vitamin D for baby
Sources
- AAP - Starting Solid Foods
- WHO - Complementary feeding
- CDC - When, What, and How to Introduce Solid Foods
- AAP - Vitamin D supplementation
🔧 Helpful Tools
- Baby Food Guide — Safe foods and introduction schedule for your baby
- Breastfeeding Tracker — Log feeds, track supply, and monitor nursing sessions
- All Baby Tools — Browse all free tools for pregnancy and baby care
📖 Related Articles
- Breakfast for Baby 6–12 Months: Ideas and Recipes — What can your baby eat for breakfast from 6 months? Age-appropriate breakfast ideas, recipes, and tips for a great start to the day. Based on international feeding guidelines.
- Hospital Bag for Birth: Complete Packing List for Parent, Partner, and Baby — Everything you need to pack for the hospital. A complete packing list for your birth stay — for the birthing parent, partner, and baby. Tips from midwives and experienced parents.