Onion skins from last night's dinner, beets from the fridge, and some turmeric from the spice rack. You already have everything you need to make the most beautiful Easter eggs — completely free of artificial dyes.
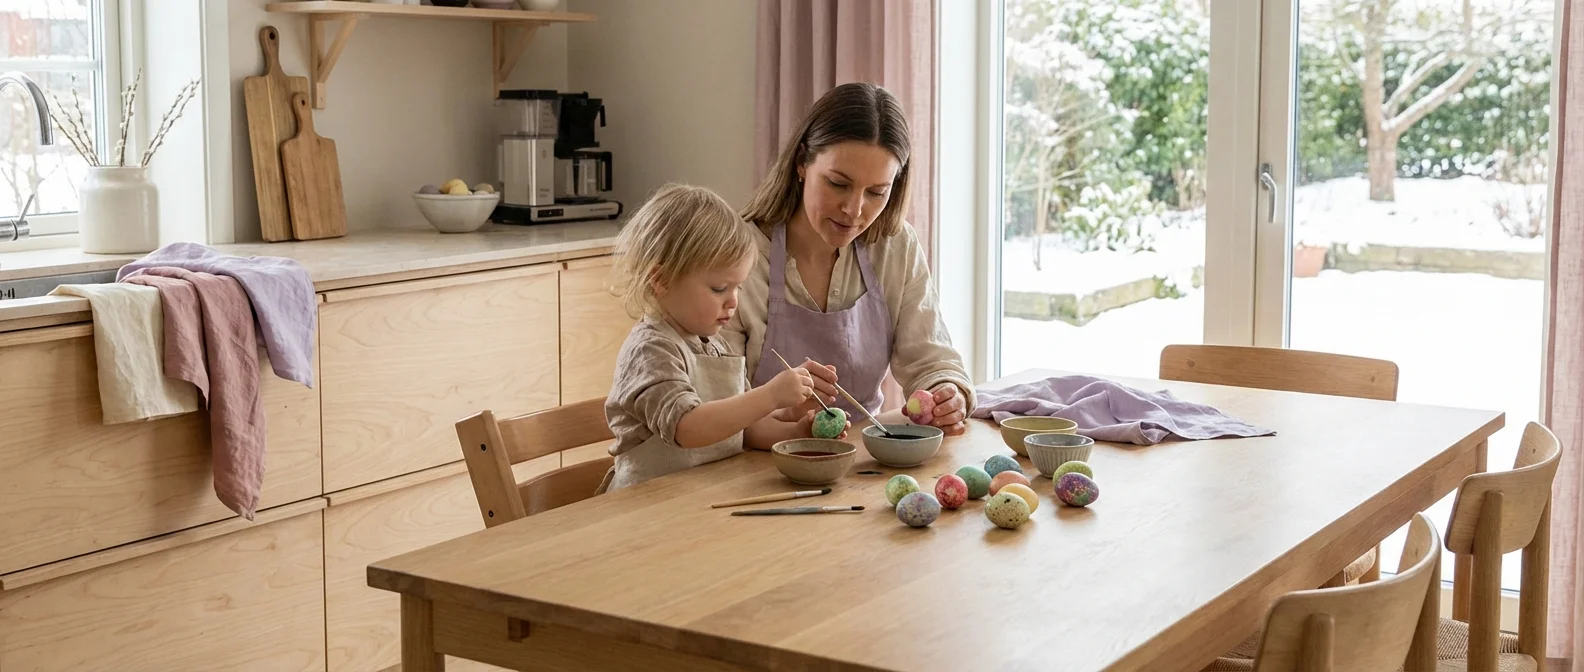
Painting Easter eggs with kids isn't about perfect results. It's about sitting together at the kitchen table, getting messy with colors, and making memories that smell faintly of vinegar and strongly of Easter.
Here you'll find recipes for natural dyes, techniques suited to your child's age, and practical tips that make the whole experience fun for everyone.
Natural Dyes from Your Kitchen
You don't need expensive dye kits from the store. The most beautiful Easter eggs are made with ingredients you already have at home. Here are the best natural dyes.
Onion Skins — Golden and Brown
The classic Easter color. Collect skins from 5–6 yellow onions. Simmer the skins in 1 liter of water for 30 minutes. Let the liquid cool completely. Place hard-boiled eggs in the dye bath for 30 minutes for a golden color, or leave them longer for a deeper brown.
Beets. Pink and Red
Boil 2 chopped beets in 1 liter of water for 30 minutes. Cool. Place eggs in the bath for 1–2 hours. The longer the egg sits, the deeper the pink. Want a true red? Leave the egg in the fridge overnight.
Turmeric. Sunshine Yellow
Stir 2 tablespoons of turmeric into 1 liter of water and bring to a boil. Cool. Place eggs in the bath for 30 minutes for a warm, yellow color. Be careful, turmeric stains everything it touches, including fingers and countertops.
Red Cabbage. Blue-Purple
Boil a chopped red cabbage in 1 liter of water for 30 minutes. Add 1 tablespoon of white vinegar. Cool. Place eggs in the dye bath for at least 2–3 hours. The result is a beautiful blue-purple color that looks almost magical.
Blueberries. Deep Purple
Boil 2 deciliters of frozen blueberries in 5 deciliters of water for 15 minutes. Cool. Place eggs in the bath for 1–2 hours for a lovely purple. Works great with berries you have in the freezer from last season.
Spinach. Soft Green
Boil 200 grams of spinach in 1 liter of water. Cool. Place eggs in the dye bath for at least 3–4 hours. Spinach gives a lighter color than the others, but the green tone is a beautiful contrast in a colorful Easter bowl.
Add 1 tablespoon of white vinegar to all dye baths for more vibrant colors. The vinegar helps the dye adhere to the eggshell. The longer the egg sits in the dye bath, the deeper and more beautiful the color.
Techniques by Age
Children at different ages have very different abilities. Here are techniques tailored to each stage, so it's fun for everyone.
6–12 Months. Sensory Color Play
For the very youngest, it's all about experiencing, not performing. Baby can watch the colors, touch the smooth eggs, and feel the textures.
- Let baby watch while you dye the eggs, the color change fascinates them
- Place finished, colored eggs in front of baby for tactile exploration
- Press baby's fingerprints onto white paper around an egg shape, a sweet Easter card
- Gently roll a hard-boiled egg across a sheet with child-safe paint
- It's about the experience, never the result
Your baby gets sensory stimulation and you get quality time together. That's enough.
1–2 Years. The Little Finger Painter
Now it really starts to get fun. One-year-olds love getting messy with their hands, and finger painting on eggs is perfect for them.
- Finger paint directly on hard-boiled eggs, let the child use their whole hand
- Sponge stamping with Easter motifs (cut simple shapes from a kitchen sponge)
- Stickers on eggs, great fine motor skills practice
- Dipping eggs in dye baths with an adult's help
- Large, thick brushes loaded with paint
Expect mess. It's part of the fun.
2–3 Years. The Little Artist
Two- and three-year-olds can create truly beautiful Easter eggs with a little guidance. They can handle a brush, understand colors, and have their own ideas about what looks good.
- Watercolors with a brush, give the child freedom to choose colors themselves
- Wax crayons and colored pencils directly on white eggs
- Natural dyes (recipes above) with the child as an active participant
- Rubber band pattern: wrap rubber bands around the egg before dyeing, the bands block the dye and create white stripes
- Leaf prints: place a small leaf (parsley works well) on the egg, secure with a piece of nylon stocking, and place in dye bath
Preparation and Clean-Up
A little planning makes the difference between a cozy Easter activity and a stressful experience.
Before you start:
- Cover the table with newspaper, a wax cloth, or an old plastic tablecloth
- Put on aprons or old clothes (turmeric stains almost never come out)
- Boil the eggs and let them cool completely
- Prepare the dye baths in glasses or cups
- Keep wet wipes and paper towels within reach
During:
- Use an empty egg carton as a drying rack for finished eggs
- Have a bowl of clean water for the child to rinse brushes
- Allow at least 30 minutes, children need time to explore
- Let the child lead, it's their project
Afterward:
- Turmeric stains on hands: rub with lemon juice
- Beet stains: cold water with a little vinegar
- Onion skin stains: dish soap works well
Tricks for Extra Beautiful Eggs
When you want to take things a step further, try these techniques. They work best for children from age 2 and up, preferably with some help.
Wax resist technique: Draw patterns with a white wax crayon on the egg BEFORE placing it in the dye bath. The wax repels the dye, and the pattern appears as white lines against the colored background. Simple and impressive.
Rubber band stripes: Wrap rubber bands around the egg in different directions. Place in dye bath. When you remove the bands, you have white stripes. Kids think this is magic.
Leaf prints: Place a small, flat leaf (parsley, dill, or a small flower) against the egg. Secure with a piece of nylon stocking. Place in dye bath. The result is a nature-inspired print that looks professional.
Masking tape: Cut thin pieces of masking tape and stick them on the egg in geometric patterns. Dye the egg. Remove the tape. Sharp, clean lines.
Glitter eggs: Spread glue on parts of the egg and sprinkle with glitter. Not the most natural option, but kids love it. Works best as decoration, not for eating.
Storage and Display
Now you have a whole collection of colorful Easter eggs. Here's how to take care of them.
Eggs you plan to eat:
- Store in the refrigerator, keeps for 1 week
- Eggs left out for more than 2 hours should not be eaten
- Natural dyes are safe to eat, all ingredients are ordinary foods
Eggs for decoration:
- Display in a bowl with moss, cress, or dried grass
- Blown-out eggs (an adult blows out the contents through a small hole) can be hung on Easter branches with string
- Use as table decorations for the Easter brunch, place on a small napkin in a little bowl
Hard-boiled eggs left outside the refrigerator for more than 2 hours should not be eaten. Want decorations that last? Blow out the contents and decorate the shell. Blown-out eggs can last for years.
Frequently Asked Questions
Are natural dyes safe for baby? Yes. All the ingredients (onion skins, beets, turmeric, red cabbage, blueberries, spinach) are ordinary foods. Still, watch out for allergies. If your baby is allergic to any of the ingredients, avoid that color. Check with your pediatrician if you have any concerns about allergens.
Can you eat eggs dyed with onion skins? Yes, absolutely. As long as the egg was cooked properly (at least 10 minutes) and stored in the refrigerator, it is safe to eat. The dye does not penetrate through the shell to the egg white.
What if my child eats the paint? Watercolors labeled for children are non-toxic in small amounts. Always choose child-approved brands (CE-marked). Natural dyes from food are of course completely safe.
How long do naturally dyed eggs last? In the refrigerator: up to 1 week. On the table as decoration: eat within 2 hours. According to food safety guidelines, hard-boiled eggs should be refrigerated and eaten within a week.
Easter Memories That Last
Painting Easter eggs with children is one of the most beautiful Easter traditions we have. It doesn't require elaborate preparation, expensive materials, or artistic talent. It just requires a little time, some eggs, and a willingness to let the kids try themselves.
Start with one natural color this year. Maybe onion skins, which generations before us have used. Next year, add beets. The year after that, perhaps your child will be the one showing you a new trick.
Looking for more Easter activities? Check out our complete Easter guide for families with activities, food ideas, and packing lists for the holiday.
Sources: Food safety guidelines (egg storage), WHO/AAP (food safety for children)
Sources
- AAP — Safe sleep guidelines for infants
- NICHD — Safe to Sleep campaign — SIDS prevention
- CDC — Infant safe sleep practices
🔧 Helpful Tools
- All Baby Tools — Browse all free tools for pregnancy and baby care
📖 Related Articles
- Painting Easter Eggs with Kids: Natural Dyes and Fun Techniques — How to paint Easter eggs with babies and toddlers. Natural dyes from onion skins, beetroot, and turmeric - safe techniques for all ages.
- Easter With Kids: The Complete Guide for Families — Everything you need for Easter with baby and toddlers — activities, egg hunts, decorations, food, scavenger hunts, packing lists, and tips for home and away.
- Easter Egg Hunt with Kids: How to Set Up the Perfect Hunt — Complete guide to Easter egg hunts for children aged 1–3. Indoors, outdoors, at the cabin — with tips on hiding spots, clues, and age-appropriate difficulty.


